Ingredients
Equipment
Method
Brownie
- Preheat the oven to 160 degrees (convection)
- Grease your pans. Line them with parchment paper and dust them with flour where the paper doesn’t fit. I use a 20x20 and a 20x35; if you have a large pan, you can use that too, but it has to be very large, otherwise the brownie will be too tall, which isn’t the intention.
- Chop the chocolate, weigh out the butter, and place it in a bowl over a bain-marie (water bath) until it has melted completely.
- Crack the eggs into a bowl and measure out the sugar and vanilla sugar into the same bowl.
- Beat the mixture with a mixer for no more than 1 minute, until it is lightly combined.
- Measure the flour, cocoa, baking powder, and salt into a small bowl. Mix them together with a fork and set them aside.
- Once the chocolate mixture has melted, remove it from the double boiler and wait until it reaches about 45 degrees.
- When the chocolate reaches 45 degrees, beat the egg mixture for a couple of minutes and begin adding the chocolate mixture in alternating layers: flour, chocolate, flour, chocolate, flour. (Do this about 3 times to incorporate everything; beat and scrape down the sides of the bowl each time. It’s important not to overbeat, so stop the mixer when you pour in the chocolate and flour, beat briefly until combined, and stop again.).
- Once the batter is smooth, pour it into the pans and bake for about 20–25 minutes in the middle of the oven. I use the convection setting if I’m baking more than one pan; otherwise, I don’t.
- Never overbake a brownie, but also keep in mind that it shouldn't be runny, since you need to be able to cut it into pieces.
- Let the brownie cool completely,
- Remove the cake from the pan and transfer it to a large plate or cutting board, where you can cut out your circles.
- I'm cutting out 9 large owls and 7 baby owls.
- Place each owl on a plate and refrigerate or freeze them while you make your frosting.
Frosting
- Measure out the cream, mascarpone, and maple syrup, and pour them into a heavy-bottomed saucepan.
- Chop the chocolate and put it in a bowl.
- Cut the butter into cubes.
- Bring the cream mixture to a boil and pour it over the chopped chocolate. Mix the two together with a spatula and add the butter; let it sit and melt for 10 minutes.
- Blend until smooth using an immersion blender. Don't worry if it separates slightly.
- Put it in the freezer for 25–30 minutes, then beat it with a mixer. Now you’ll have a delicious, rich buttercream that you can use to frost your little brownie pieces.
Decorating
- Spread a generous layer of frosting on each cake so they look uniform. (It’s best to frost the cakes while they’re cold, as this helps the frosting adhere easily to the cake and makes it easy to apply a thick layer.)
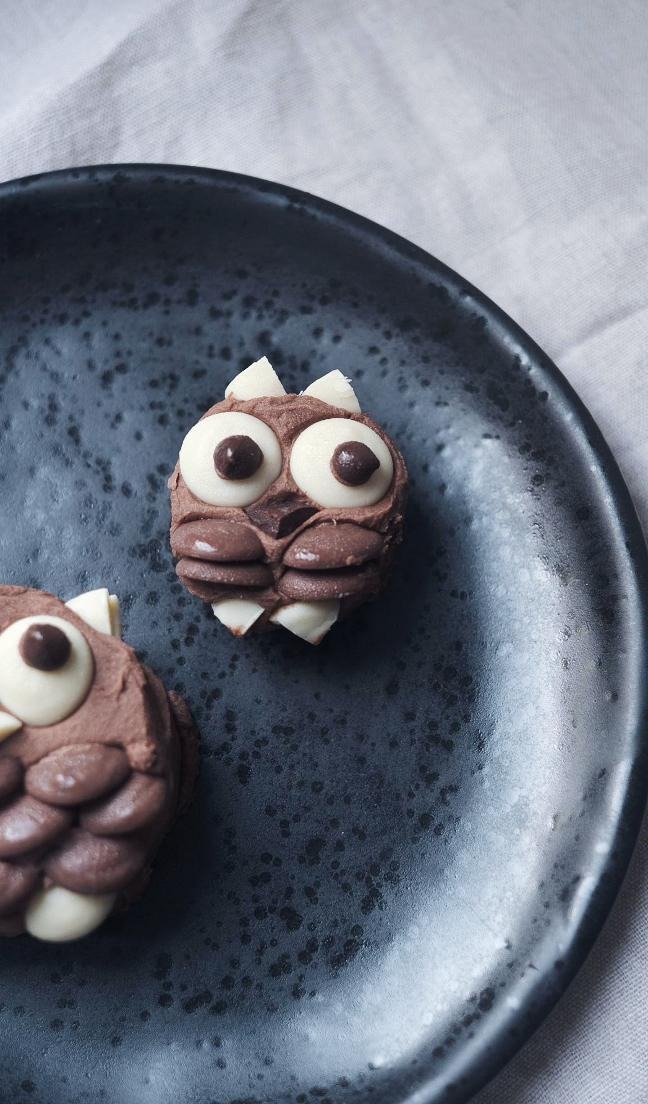
- Decorate with chocolate buttons—cut them into quarters for the ears, beak, and claws. Use halves for the feathers. Use whole white ones for the eyes, along with small buttons for the pupils. You can customize the plumage so that each owl has its own unique look.
- I suggest you decorate the adult owls first and then the baby owls, since the baby owls are a little harder to decorate, so practice on the adults and make the little ones last.
- I store the brownies in the fridge or freezer. They’ll keep for several months in the freezer. Just take them out 1 hour before serving—and yes, they actually get better after sitting for a bit, so the brownie becomes super fudgy. You can expect to have an extra jam jar’s worth of frosting left over after decorating. You can then treat your family to it on buns and the like. It tastes wonderful and just needs to be taken out 30 minutes before use, just like butter.
- Now your owls are ready to serve. I hope you’ll enjoy them and that they’ll bring joy to the young at heart—all without any artificial colors or refined sugar.